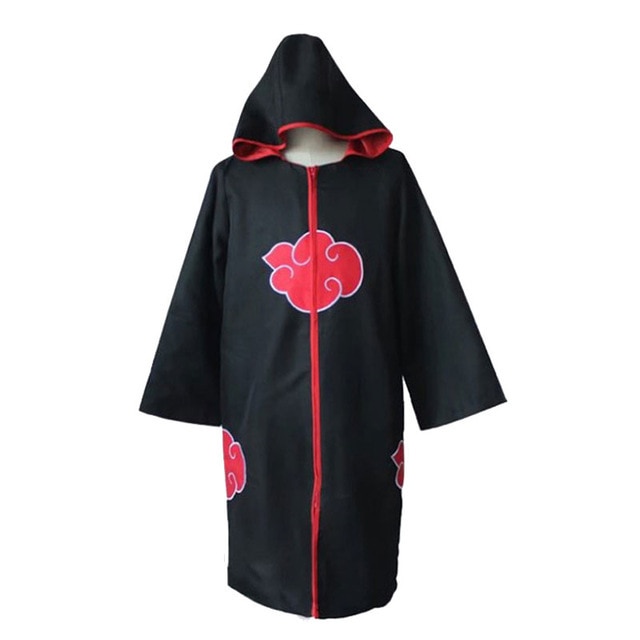
The Akatsuki mobsters are well known characters from the Naruto anime. They are known for their long, surging dark and red cloaks, which makes the cloaks famous “cosplay” pieces of clothing for fans. Assuming you are searching for a method for making your own Akatsuki cloak, you truly need to have insight in sewing, particularly covers and cloaks. Recall that the specific estimations of the cloak differs as indicated by your own estimations.
Stage 1
Measure the length of your own body to get the estimations for the actual cloak. The front and back of the cloak will be the length from your shoulders to your knees. The sleeves will go beneath your wrists and be extremely wide. You likewise need your neck and shoulder estimations.
Stage 2
Cut the dark texture into the boards required for the cloak’s principal body. You want a solitary board for the back and two remaining and right boards for the front, since the front opens up. The sides are molded similar as exceptionally tall trapezoids on both the front and back. They have adjusted clefts cut close to the top for the sleeves and collar.
Stage 4
Make the collar by slicing texture sufficiently long to stretch around the circuit of the neck opening. Its level ought to adjust to your neck.
Stage 3
Shear the sleeves out of the texture by cutting all the more lengthy trapezoids. These pieces should be the length of your arm, which you estimated prior. The highest point of each should be just about as wide as the periphery of your sleeve openings. The base ought to be wide enough so the sleeve’s breadth toward the end is around three inches longer than your wrist.
Stage 5
Make the internal covering by removing similar examples of the red texture. This is required provided that you believe the cloak should be a definite imitation. The red pieces ought to be about a half-inch bigger than the dark ones. Sew the red boards onto the dark ones so the dark texture is on top of the red with the red texture shaping a boundary around the dark.
Stage 6
Sew the cloak along with a sewing machine, interfacing the front boards to the back board on the sides. Sew every sleeve board’s sides together, then sew the sleeves to the cloak and the collar to the top.
Stage 7
Remove cloud plans from the red texture and add a white diagram to the mists with paint and a fine-tipped brush. Make five of these mists and sew them onto the cloak in different positions.
